Hello Developers,
In this tutorial, I will share with you how to import and export Excel and CSV files in Laravel. we are going to use maatwebsite/excel composer package for import and export tasks. In the example, we will create a simple form for input where you’ll be able to upload a CSV file and create multiple users. After that, we will create an export route that will download all users from the database in an excel file.
Follow the below step to create the import and export function in the Laravel 9 application. Export the file with .csv, .xls and .xlsx file.
Step 1: Install Laravel 9
You can create the Laravel app, then execute the below command:
composer create-project laravel/laravel example-app
Step 2: Install maatwebsite/excel Package
Install the maatwebsite/excel package through the Composer package manager, so one your terminal and fire bellow command:
composer require psr/simple-cache:^1.0 maatwebsite/excel
If, you are not using the Laravel 9 versions then use the below command:
composer require maatwebsite/excel
Step 3: Create Dummy Records
Create some dummy records for the user’s table, so as to export them with that user. Run the below command:
php artisan tinker
User::factory()->count(10)->create()
Step 4: Create Import Class
In maatwebsite 3 version offers a way to build an import class and we’ll be using the controller. Run the below command and change the below command:
php artisan make:import UsersImport --model=User
app/Imports/UsersImport.php
<?php
namespace App\Imports;
use App\Models\User;
use Maatwebsite\Excel\Concerns\ToModel;
use Maatwebsite\Excel\Concerns\WithHeadingRow;
use Hash;

class UsersImport implements ToModel, WithHeadingRow
{
    /**
    * @param array $row
    *
    * @return \Illuminate\Database\Eloquent\Model|null
    */
    public function model(array $row)
    {
        return new User([
            'name'     => $row['name'],
            'email'    => $row['email'],
            'password' => Hash::make($row['password']),
        ]);
    }
}
Step 5: Create Export Class
maatwebsite 3 versions provide a way to build the export class and we’ll be using the controller. Run the below command and use the below code:
php artisan make:export UsersExport --model=User
app/Exports/UsersExport.php
<?php
namespace App\Exports;
use App\Models\User;
use Maatwebsite\Excel\Concerns\FromCollection;
use Maatwebsite\Excel\Concerns\WithHeadings;

class UsersExport implements FromCollection, WithHeadings
{
    /**
    * @return \Illuminate\Support\Collection
    */
    public function collection()
    {
        return User::select("id", "name", "email")->get();
    }

    /**
     * Write code on Method
     *
     * @return response()
     */
    public function headings(): array
    {
        return ["ID", "Name", "Email"];
    }
}
Step 6: Create Controller
Create UserController with index(), export() and import() method. Run the below command and update the code:
php artisan make:controller UserController
Now, update the code on the UserController file.
app/Http/Controllers/UserController.php
<?php

namespace App\Http\Controllers;

use Illuminate\Http\Request;
use App\Exports\UsersExport;
use App\Imports\UsersImport;
use Maatwebsite\Excel\Facades\Excel;
use App\Models\User;

class UserController extends Controller
{
    /**
    * @return \Illuminate\Support\Collection
    */
    public function index()
    {
        $users = User::get();

        return view('users', compact('users'));
    }

    /**
    * @return \Illuminate\Support\Collection
    */
    public function export()
    {
        return Excel::download(new UsersExport, 'users.xlsx');
    }

    /**
    * @return \Illuminate\Support\Collection
    */
    public function import()
    {
        Excel::import(new UsersImport,request()->file('file'));

        return back();
    }
}
Step 7: Create Route
Create routes for a list of users, import users, and export users. Open the “routes/web.php” file and add the following route.
routes/web.php
<?php
use Illuminate\Support\Facades\Route;
use App\Http\Controllers\UserController;

/*
|--------------------------------------------------------------------------
| Web Routes
|--------------------------------------------------------------------------
|
| Here is where you can register web routes for your application. These
| routes are loaded by the RouteServiceProvider within a group which
| contains the "web" middleware group. Now create something great!
|
*/

Route::controller(UserController::class)->group(function(){
    Route::get('users', 'index');
    Route::get('users-export', 'export')->name('users.export');
    Route::post('users-import', 'import')->name('users.import');
});
Step 8: Create Blade File
Create users.blade.php(resources/views/users.blade.php) for the layout and will use the below code:
resources/views/users.blade.php
<!DOCTYPE html>
<html>
<head>
    <title>Laravel 9 Import Export Excel to Database Example</title>
    <link href="https://cdn.jsdelivr.net/npm/bootstrap@5.0.2/dist/css/bootstrap.min.css" rel="stylesheet">
</head>
<body>

<div class="container">
    <div class="card bg-light mt-3">
        <div class="card-header">
            Laravel 9 Import Export Excel to Database Example
        </div>
        <div class="card-body">
            <form action="{{ route('users.import') }}" method="POST" enctype="multipart/form-data">
                @csrf
                <input type="file" name="file" class="form-control">
                <br>
                <button class="btn btn-success">Import User Data</button>
            </form>

            <table class="table table-bordered mt-3">
                <tr>
                    <th colspan="3">
                        List Of Users
                        <a class="btn btn-warning float-end" href="{{ route('users.export') }}">Export User Data</a>
                    </th>
                </tr>
                <tr>
                    <th>ID</th>
                    <th>Name</th>
                    <th>Email</th>
                </tr>
                @foreach($users as $user)
                <tr>
                    <td>{{ $user->id }}</td>
                    <td>{{ $user->name }}</td>
                    <td>{{ $user->email }}</td>
                </tr>
                @endforeach
            </table>

        </div>
    </div>
</div>

</body>
</html>
Run Laravel App
Now, type the given below command and run the Laravel app:
php artisan serve
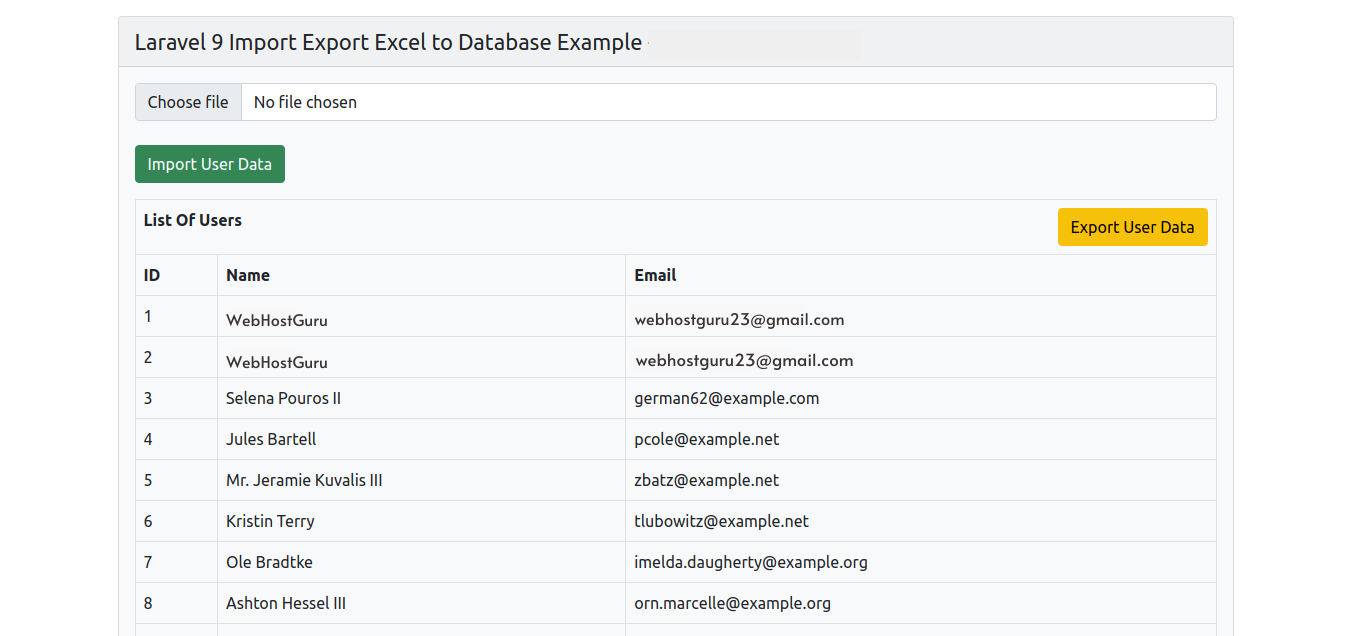
Now, navigate to the web browser, type the given URL and view the app output:
http://localhost:8000/users
OUTPUT