How To Fix “The Link You Followed Has Expired” Error in WordPress
You can see on websites ‘The link you followed has expired’ an error in WordPress?
This error does not give an idea about what’s is the problem, which is why it is difficult for beginners to resolve.
What Causes the Link You Have Followed Has Expired Error?
This error is seen/observed when you are trying to upload a WordPress theme or a plugin to your website from the WordPress admin area.

WordPress hosting companies consist of a setting that provides controls on the size of files you can upload from within the WordPress admin area. They also have a setting that stops scripts from running too long.
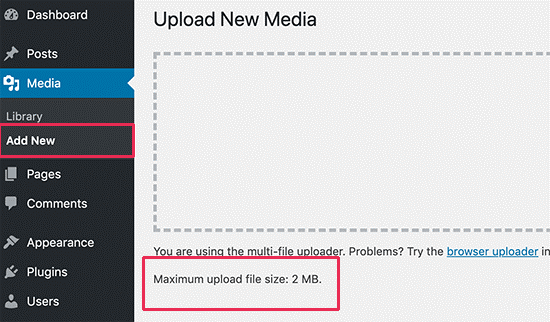
You can see the file size upload limit by going to the Media » Add New page.
These types of restrictions keep your website safer and help in improving the overall performance of your WordPress hosting server.
If these settings are too low, or you are trying to upload a larger file, then errors like memory exhausted error or maximum execution time exceeded error are seen.
However, while uploading a WordPress theme or plugin, then you will see the ‘The link you followed has expired “error.
That being said, let’s take a look at how to easily fix this problem.
Fixing ‘The Link You Have Followed Has Expired’ Error
The easiest way to fix the ‘The link you followed has expired’ error is by increasing the file upload size, PHP memory, and execution time limits for your website.
There are multiple ways to do that but below are the main methods to do so:
Method 1) Increasing limits in the functions.php file
This method is easy and will enable your site to return back to the old limits if you change the WordPress theme. If you want to change your theme, then use one of the other two methods mentioned below.
Try the following code to your WordPress theme’s functions.php file.
					@ini_set( 'upload_max_size' , '120M' );

@ini_set( 'post_max_size', '120M');

@ini_set( 'max_execution_time', '300' );
Increase the values in upload_max_size and post_max_size to be more than the file you are trying to upload.
All you need to do is to increase the max_execution_time to the time you think it would take for the file to upload. If you are not sure, then you can try doubling this value.
Method 2) Fix by increasing limits in .htaccess file
You can use the .htaccess method if you do not wish to add code to your theme’s functions file.
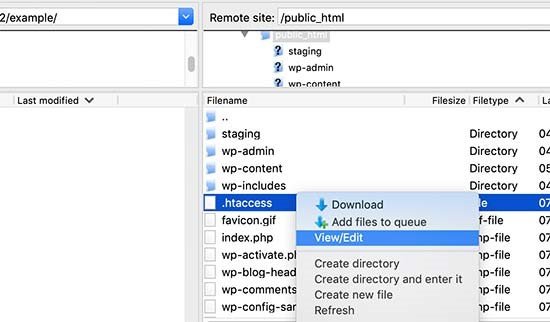
To use this method, you need to edit the .htaccess file with an FTP client or the File Manager app in cPanel.
Connect to your website using FTP and edit the .htaccess file.
Now, add the following code at the bottom of your .htaccess file.
php_value upload_max_filesize 128M
php_value post_max_size 128M
php_value max_execution_time 300
php_value max_input_time 300
Save the changes and upload the file back to your website.
Method 3) Fix by increasing limits in php.ini file
The php.ini file is a configuration file that is used by PHP and WordPress. Connect to your WordPress site using an FTP client and search for the php.ini file in the site’s root folder.
Most of the users are on a shared hosting account, so they won’t find it in their site’s root folder. In this scenario, create a blank php.ini file using a plain text editor like Notepad and upload it to your website.
Edit the php.ini file and add the following code inside it.
upload_max_filesize = 128M
post_max_size = 128M
max_execution_time = 300
Now, save your changes and upload the file back to your website.
Visit your website and upload the theme or plugin file. The error will disappear, and you will be able to upload the file.
If it doesn’t work, then increase the file limits to match the file size you are trying to upload.